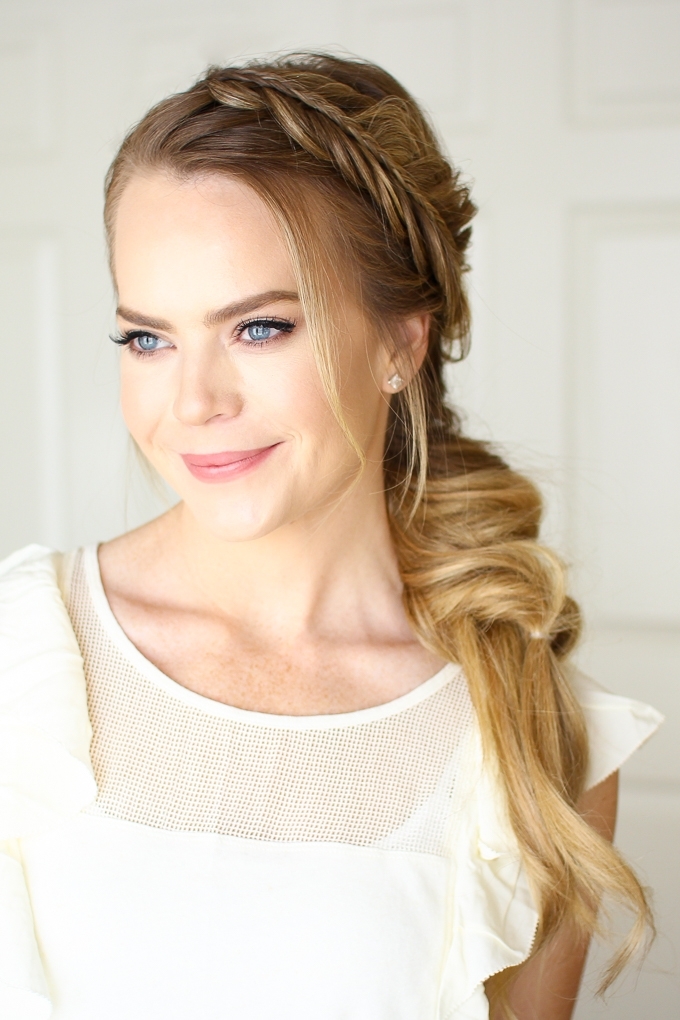
 Summer is coming up quick and I’ve been compiling some great ideas for heatless hairstyles. I recently posted a bunch of pictures on Snapchat asking which ones you guys would like to see as a tutorial. This one got a bunch of votes and I was so glad because it was one of my favorites.
I feel like this style has such a boho vibe and I love how intricate it looks. Of course, once it’s broken down into steps it’s definitely doable and perfect for Coachella season which is happening right now! Even if you’re not going it’s always a good idea to wear a cute hairstyle even if it’s just for fun! I hope you enjoy my recreation of the hairstyle! Be sure to let me know if you recreate this look or create your own variation of it!
Outfit details: CREAM RUFFLE TOP | Inspo picture

Stacked Fishtail Elastic Braid Supplies:
 Stacked Fishtail Elastic Braid Instructions:
- Step 1 / For this hairstyle start by parting the hair on the right side.
- Step 2 / Now divide out a small section of hair on the heavy side of the part, near the middle, and braid this into a regular three strand braid. Then criss-cross two bobby pins over the bottom and clip it out of the way.
- Step 3 / Next create a dutch fishtail braid, under the previous braid, bringing in sections and continuing it down the left side of the head until it reaches the left ear.
- Step 4 / Then braid the section a little further down before going back over the braid, pulling on the edges to make it wider and more full. Criss-cross two bobby pins over the ends so it doesn’t unravel.
- Step 5 / Now let down the 3-strand braid and lay this down the center of the fishtail braid.
- Step 6 / Then tuck the braid through the fishtail braid so the ends come out underneath it.
- Step 7 / Now wrap the braid around the back of the head, pin it in place with bobby pins, and remove the criss-crossed ones.
- Step 8 / Next divide off a small section of hair from the right side of the head. Twist this together and lay it over the ends of the fishtail braid, pinning it in place.
- Step 9 / Now create a series of topsy tails so divide off a small section of hair from the right and left side of the head and tie them together with a clear elastic band.
- Step 10 / Then flip the tail around the elastic band so the sides become twisted. Then tighten it underneath the braid and gently loosen the edges of the twist so it shows up a little better.
- Step 11 / Now create one more topsy tail with the hair at the nape of the neck. Tying it off with an elastic band, flipping the ends around the elastic and then pulling on the edges to make the twists fuller.
- Step 12 / Then create two or three more topsy tails working down the remaining hair. You can create as many or as few topsy tails as you’d like. I like to leave a bit of hair at the ends but you can going all the way to the bottom if you prefer.


Holy cow, thank you for this tutorial, Missy! My hair isn’t long enough for the fluffy pony tail, but the stacked Dutch fishtail I can do! Your hairstyles are always stunning and they’re just amazingly intricate without being too complicated. I just finished a round-up of my favorite graduation hairstyles and linked to 9 of your tutorials, if you can believe it! So thank you for the tips and inspiration. (: