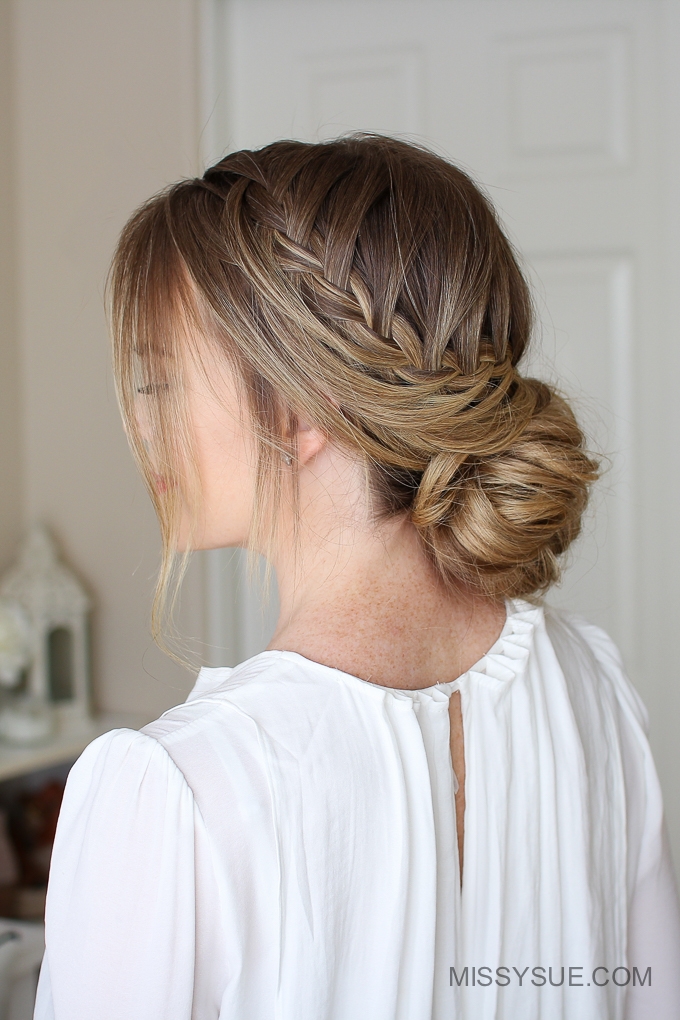

I have been all about the heatless hairstyles lately and wore this one a few days ago. I randomly remembered this old looped braid tutorial and decided to throw the rest of my hair up into a messy bun. Of course, I loved the hairstyle so much I thought it’d be fun to share as a tutorial. After finishing filming I saw that I already had a similar tutorial, this Looped Braid Updo. The older version is from a few years ago and is way more intricate than this style so I thought it’d be fun to share an updated version.
I’m not sure if prom season is already past but this style or the more intricate version would be so perfect for the occasion. What do you think though? Would you wear this as an everyday hairstyle or save it for a special occasion?

Looped Braid Low Bun Supplies:
Looped Braid Low Bun Instruction:
- Step 1 / Begin by creating a part on the right side.
- Step 2 / Then pick up a section of hair on the left side and divide it into three smaller pieces.
- Step 3 / Begin a regular braid by crossing the right strand over the middle and then the left strand over the middle.
- Step 4 / Create one more cross over bringing in a new section of hair on both sides.
- Step 5 / Then cross the right strand over the middle and add in a new section of hair.
- Step 6 / Now begin creating the sections for the loops so split the left strand in half and cross one half over the middle strand into the braid while leaving down the other half.
- Step 7 / Then add in a new section of hair from under the braid.
- Step 8 / Repeat steps 5-7 until there are four strands hanging down.
- Step 9 / Once there are four strands hanging down begin bringing them into the braid, one at a time, instead of adding in hair from underneath like before.
- Step 10 / So bring the first strand into the braid and repeating the previous steps, cross the right strand over the middle, and bring in a new section of hair.
- Step 11 / Now s the left strand into two sections, crossing one over the middle into the braid, leaving the other half hanging down. Then pick up the next hanging section and cross it into the braid as well.
- Step 12 / Then repeat these steps continuing the braid, adding in the hanging pieces to create loops until the braid reaches around the head.
- Step 13 / Now braid the section a little further down and cross two bobby pins over the ends so it doesn’t unravel. Then clip the braid out of the way.
- Step 14 / Next combine the remaining hair together at the nape of the neck and wrap a hair band once over the hair.
- Step 15 / Then twist the hair band over your dominant hand and spread the ponytail around the hair band to form a donut shape.
- Step 16 / Wrap the hair band twice more over the donut to create the base of the bun.
- Step 17 / Pull on the edges of the bun to make it a little bigger and this will also tighten it against the head.
- Step 18 / Now take the ends, loop them back towards the top of the bun, and tuck them into the hair band.
- Step 19 / Let down the braid and wrap it around the bun, clock-wise, pinning it in place with bobby pins so it doesn’t come loose.
- Step 20 / Set the style with hairspray and smooth down any flyaways.


