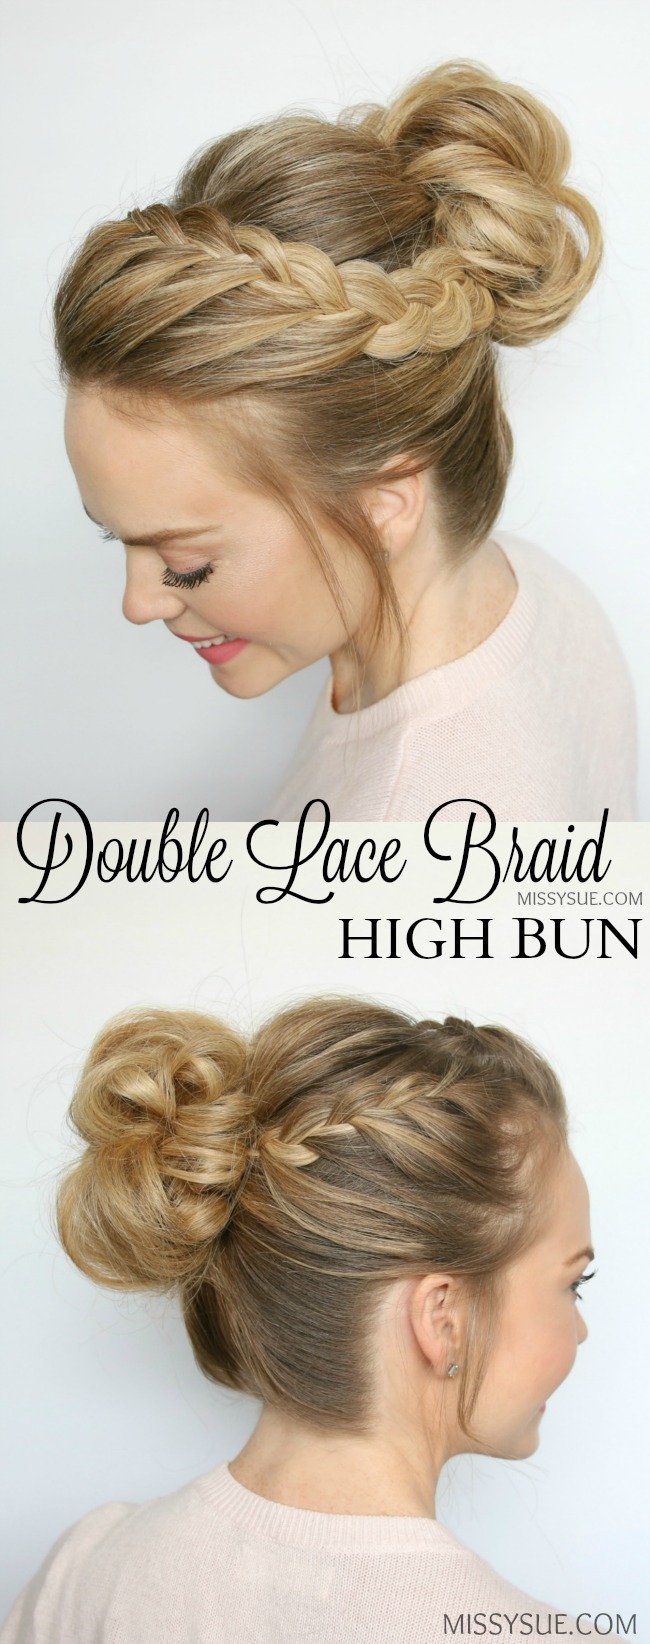

Prom is coming up and I’ve received soooo many requests for a high bun tutorial.
I am in love with this style that features a cute lace braid in a headband style accompanied by a second lace braid on the opposite side. Then it’s all tied together into my favorite top knot that is so easy to recreate I have no doubt it’ll soon become your favorite too!
This style was inspired by @tonyastylist on instagram who does amazing hairstyles so be sure to check her out!
Double Lace Braid High Bun Supplies:
Double Lace Braid High Bun Instructions:
- Step 1 / Brush through the hair to remove any tangles. I am working with second day hair and leftover curls.
- Step 2 / Next part the hair in a deep side part on the right side of the head and clip away the hair on the right side.
- Step 3 / Divide off the hair at the crown and use a sectioning clip to keep this out of the way.
- Step 4 / With the section remaining on the left side pick up a 3″ long slice of hair near the part and divide it into three smaller pieces.
- Step 5 / Cross the strand on the right over the middle and then the strand on the left pushing the braid back as far as it will go so there is a large space between the braid and the forehead.
- Step 6 / Cross the right strand over the middle and then the left strand again and bring in a new slice of hair, continuing to keep the braid angled far back from the forehead. This will allow volume in the braid once it’s done.
- Step 7 / Continue the braid, only bringing in hair along the hairline until it reaches the left temple.
- Step 8 / Now braid the section to the bottom in a regular braid, tying off the end with a clear elastic band.
- Step 9 / Next let down the hair on the right side and divide off a section of hair about 2″ back from the hair line angled diagonally downwards towards the back of the head.
- Step 10 / Create a second lace braid towards the back of the head, only bringing in along the hairline like the previous braid.
- Step 11 / Once the braid reaches the left ear and that is the last section brought in then braid to the bottom, tying off the end with a second elastic band.
- Step 12 / Now brush all the hair up into a high ponytail and add in the braids.
- Step 13 / Remove the elastics from the ends of the braids and carefully unravel them.
- Step 14 / Take a hair band and loop it over the ponytail as if securing it in place. On the last loop, however only pull the hair part way through so as to create a small bun with the ends hanging down the back.
- Step 15 / Take small sections from the front of the bun and bring them down towards the head, pinning them in place.
- Step 16 / Continue pinning small pieces until the front of the bun looks the way you prefer.
- Step 17 / Take the ends hanging down from the back of the bun and divide off a small section.
- Step 18 / Loop it up towards the hair band and gently tuck it into the band to create a loop.
- Step 19 / Pick up a new piece and tuck it in as well, continuing until the hair is all tucked; I did three pieces total.
- Step 20 / Gently pull on the top and bottom of these pieces to make the bun more full and symmetrical.
- Step 21 / Take a comb and carefully brush up the back of the hair, from the nape of the neck towards the bun, to smooth out the hair.
- Step 22 / Gently pull on the edges of the braids to make them appear more full.
- Step 23 / Then mist the style with hairspray and smooth down any remaining flyaways.

Will you please post an Easter makeup/hair tutorial?
This is such a cute hairstyle – I would’ve loved wearing it to prom! I was always too afraid to do up-do’s when I was in high school, and I regret it so much now. I love wearing my hair up now because it’s nice to have it out of my face! I’ll have to try this one out for a night out!
xx
Kendra | Stnkrbug