
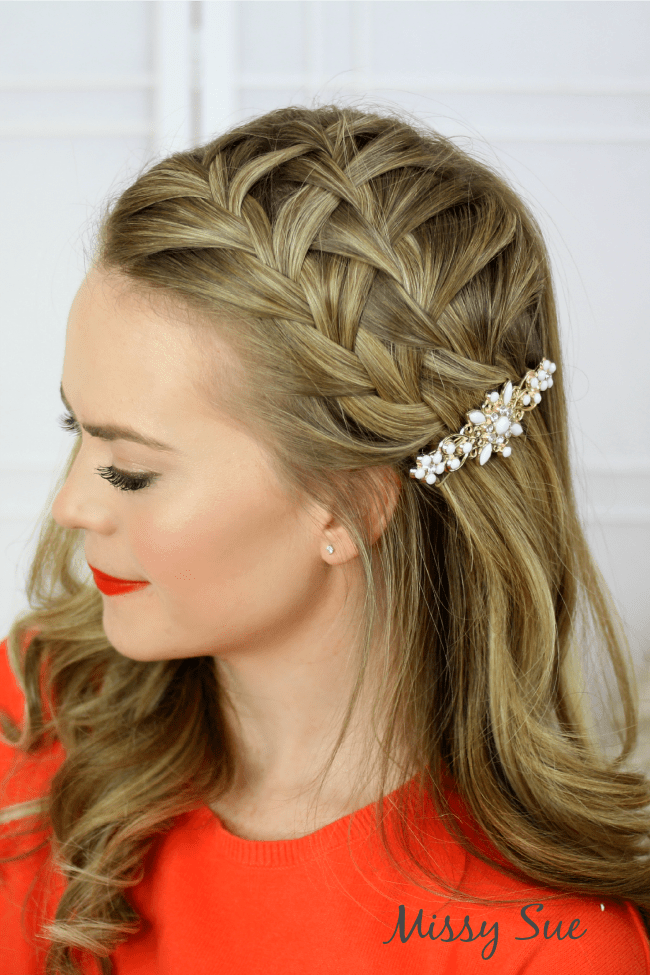
Braid 20-Double Headband Waterfall Braid is the inverted version of the Double Woven Headband Braid and the last braid in the series!!!
You guys, this series has been so tough; I am not even going to lie!
I love braids and this has truly tested my skills and abilities! Not to mention my creative juices! I tried very hard to bring you new styles that you haven’t seen before. I hope I accomplished that while still sharing styles that you can recreate at home!
I am sure you are anxious for the regular posting schedule to return and it will starting this week! Get ready for some great new makeup posts, fashion posts, and of course, more hairstyles!
My recipes have been waning recently and I know some of you have requested those come back. We will see about that bit. Those are a tad harder for me to come up with so I will see what I can do. 

Follow these steps to get your own version of the Double Headband Waterfall Braid:
Step 1 / Section off the front section of hair; from the part down to the ear. Tie this off with an elastic band.
Step 2 / Take a piece of hair next to the part on the heavy side and divide this into three strands.
Step 3 / Cross the back strand over the middle.
Step 4 / Now cross the front strand over the middle.
Step 5 / Next cross the back strand over the middle and bring in a piece of hair right behind it.
Step 6 / Then take the front strand, that would normally cross over next, and wrap it to the other side of the hair. Pin this off so it stays out of the way.
*This is the same method to achieving a Waterfall Braid.
Step 7 / Grab a section of hair right below the strand we separated away and cross it over in its place.
Step 8 / Now repeat steps 5 through 7 until you reach the left ear.
Step 9 / Tie off the braid with a clear elastic band.
Step 10 / Now remove the pin that was holding all the waterfall strands and let them fall downwards.
Step 11 / Grip a section of hair right near the part, along the hairline, and separate this into three sections.
Step 12 / Cross the left strand over the middle and then the right; as you would for a French braid.
Step 13 / As you cross the back strands over the middle, bring in the Waterfall strands that were separated out.
Step 14 / Continue braiding until it reaches the base of the first braid.
Step 15 / Tie off the braid with a clear elastic band.
Step 16 / Next, hold the braids back against the head and secure a pretty clip over the top to hold them against the head.
Step 17 / Remove the clear elastic bands from the braids.
Step 18 / Finish by curling the ends of the hair with a curling iron or wand.
Step 19 / Spray the braids with a bit of hairspray to keep them in place throughout the day.
And that’s it!
The last braid in the 20 Braid for Spring series!
I cannot believe I made it! xoxo