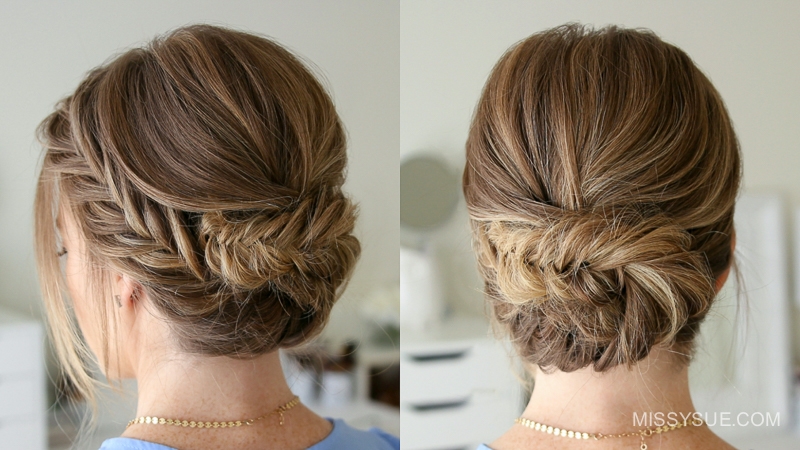

Recently, I cut off a few inches of my hair and am excited to be posting a tutorial that is perfect for medium-length hair. I am also not wearing any extensions in this video (yay!) so that’s a bonus too!
There are tons of school dances coming up soon and I think this hairstyle would be so perfect for homecoming or the Christmas dance. Speaking of Christmas it’d also work well for a holiday office party or evening out.
The inspiration behind this look is from Lena @lenabogucharskaya on instagram. She does beautiful work and you should really check out her page if you love to browse hair accounts like I do.
I hope you enjoy this quick tutorial! Be sure to let me know what you think in the comments section down below! Thanks so much for watching! xoxo, Missy
Tucked Fishtail Braid Updo Supplies:
- Rattail comb
- Bobby pins
- Medium-hold hairspray
Tucked Fishtail Braid Updo Instructions:
- Step 1 / Start by parting the hair on the right side.
- Step 2 / Now take a small section from the crown and pin it with a bobby pin at the back of the head.
- Step 3 / Then take another section from the right side of the head, underneath the previous one, and pin it against the back of the head.
- Step 4 / Continue pinning sections of hair until all of the hair from the right side of the head is pinned at the back of the head.
- Step 5 / Now take a small section from the left side of the crown, twist this towards the back of the head and pin it in place with bobby pins.
- Step 6 / Next begin the fishtail braid by picking up a small section from the part line and dividing it into two sections.
- Step 7 / Cross a small section from the right side over to the left and then cross a small section from the left over to the right side.
- Step 8 / Now cross a small section from the right side over to the left side and then pick up a new section of hair and cross it over to the left side as well.
- Step 9 / Then do the same thing on the left side, crossing a small section over and then pick up a new section and cross it over to the right side as well.
- Step 10 / Now just repeat those steps, continuing the braid down the left side of the head and then curve the braid towards the back of the head.
- Step 11 / Once all of the hair is brought into the braid then just braid the section to the ends and cross two bobby pins over the bottom so it doesn’t unravel.
- Step 12 / Now go back over the braid and pull on the edges to make it a little bit bigger.
- Step 13 / Then I’m going to lay the braid back over itself and pin it with bobby pins.
- Step 14 / Then tuck the ends of the braid underneath the hair at the crown and pin it in place with bobby pins.


Hello Missy! I wanted to say thank you for being such a inspiration to me! I knew like nothing about makeup before I found your blog, which I think was several years ago. I first learned about contouring, highlighting, the works, on your blog! I have watched your makeup tutorials over and over. Your blog gave me a love for fashion and inspired me to get creative with my clothes! I am actually on the verge of starting my own fashion blog. I wanted to say a hearty thank you for all the help you’ve given me!
Sincerely,
SJ