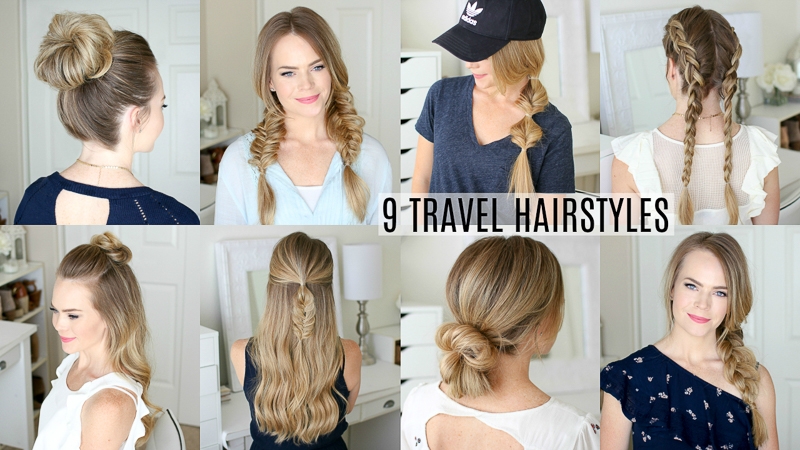
Summer is coming so I thought it’d be fun to share a bunch of different hairstyles that are easy to do and wear while you’re traveling. I always want my hair out of my face so I’ve compiled a few of my favorites that are simple and basic so you can have a few ideas for what to do with your hair the next time you’re jetting off on a flight or packing up for a road trip. Let me know what your favorite hairstyle is to wear when you’re traveling and which one of these you liked best! xo, Missy

9 Easy Travel Hairstyles Supplies:
- Paddle brush
- Rattail comb
- Clear elastic bands
- Hair bands
- Bobby pins
- 1 1/4″ Curling iron
- Medium-hold hairspray

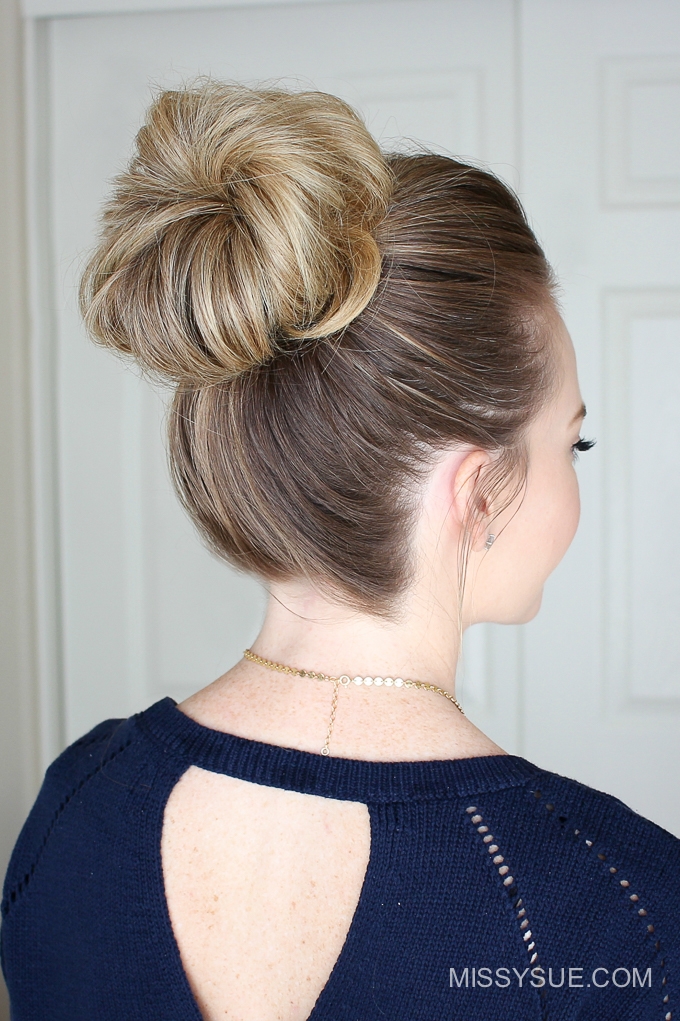
Messy Bun Instructions:
- Step 1 / Start by brushing all of the hair into a high ponytail.
- Step 2 / Take a hair band and wrap it once over the ponytail.
- Step 3 / Twist the band over your dominant hand and then use the other hand to spread the hair around the ponytail base.
- Step 4 / Wrap the hair band twice more over this base. You can wrap it more or less depending on the thickness of your hair.
- Step 5 / Pull on the edges of the bun until it’s as big as you want. T
- Step 6 / Take the hair left sticking out and wrap it around to the front of the head, tucking it into the hair band to form another loop at the front of the bun.


Half Up Bun Instructions:
- Step 1 / Start by gathering a section of hair at the top of the head.
- Step 2 / Twist the section together and wrap it clock-wise into spiral then pull the end through the middle and continue wrapping the ends around the bun.
- Step 3 / Wrap a clear elastic band around the bun and then pin down any edges so it’s flush with the head.
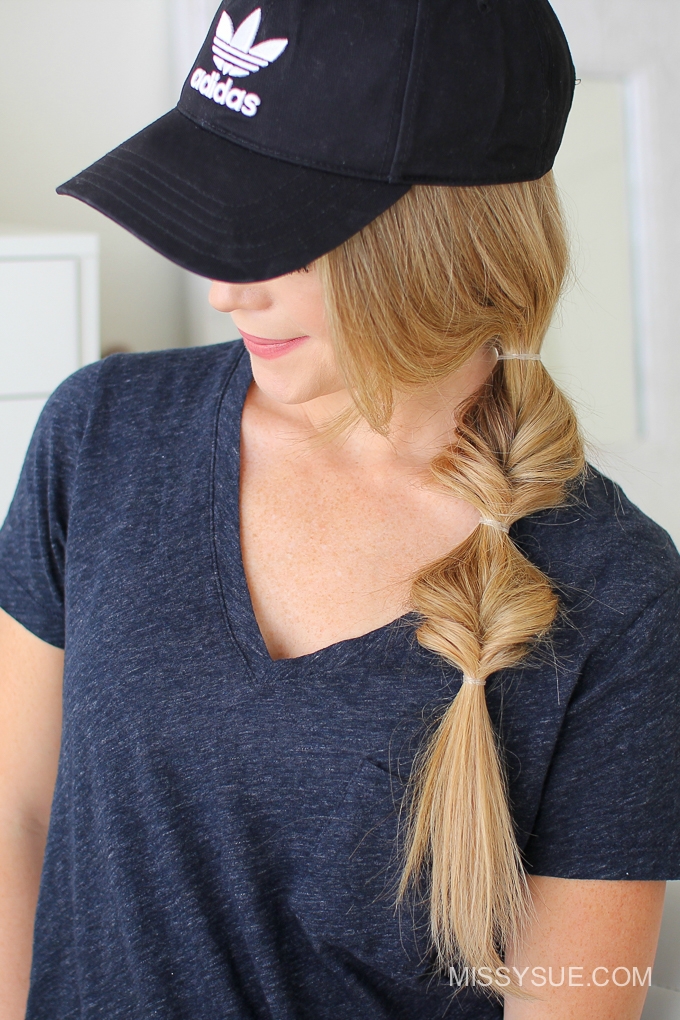
Topsy Tail Side Braid Instructions:
- Step 1 / For this style, bring all of the hair over one shoulder and tie it together with an elastic band.
- Step 2 / Now tie a second elastic band about 3 inches down from the first elastic.
- Step 3 / Create a gap in the hair between the elastic bands and flip the ends through the gap to create a twist.
- Step 4 / Then you can pull on the edges to make the twists a little bit bigger so they’re easier to see.
- Step 5 / Next tie a third elastic band another 3 inches down and then create a gap above the band and clip the ends through the gap.
- Step 6 / Then pull on the edges of the twists to make them a little bigger.
I love this style with a baseball cap as well and it only takes a few minutes to do.

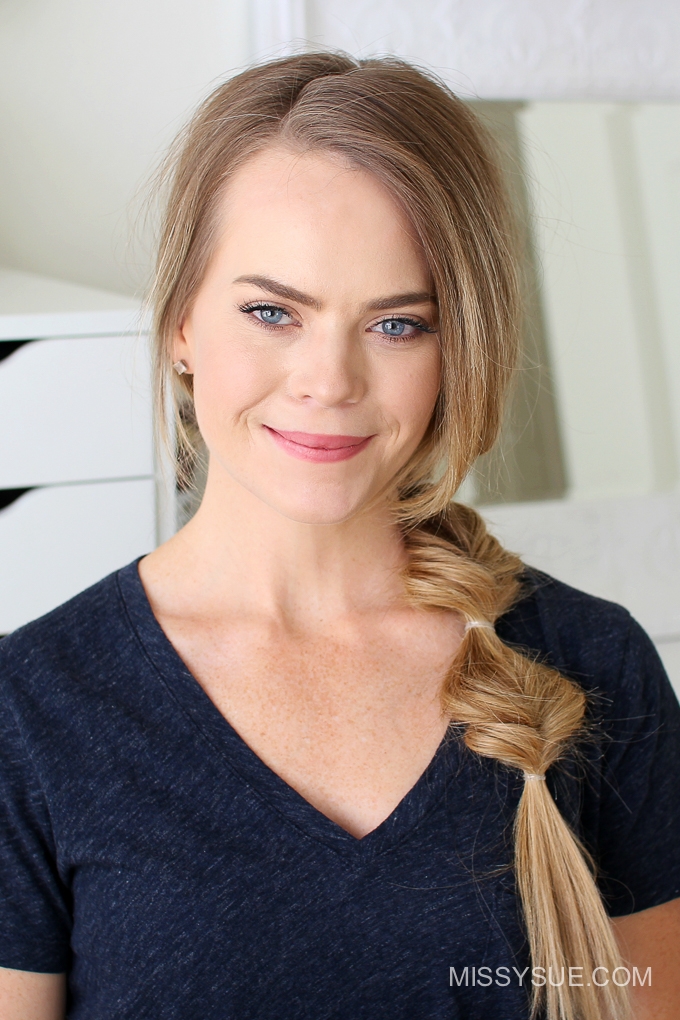
Side Braid Instructions:
- Step 1 / For this style start by bringing all of the hair over the left shoulder.
- Step 2 / Then divide the hair into three smaller sections and cross the side strands under the middle strand.
- Step 3 / Continue the braid down the section and then once the braid reaches the bottom you can go back over it, pulling on the edges to make the braid wider.
- Step 4 / Tie off the end with an elastic band.
- Step 5 / Then take a small piece of hair and wrap it around the elastic band and tie a second elastic over the bottom of the wrapped piece making sure to include the ends and this will hold the wrapped piece in place.
Two Fishtail Braids Instructions:
- Step 1 / Begin by dividing the hair into two equal halves, a left and right side.
- Step 2 / Take one side and divide it into three sections.
- Step 3 / Begin a regular braid crossing the side strands over the middle strand.
- Step 4 / Then combine two sections together and braid the rest of the section into a fishtail braid.
- Step 5 / Half way down the hair go back over the braid, pulling on the edges to make the braid fuller.
- Step 6 / Then just continue the braid down to the ends, pull on the edges to make the braid bigger, and tie it off with an elastic band.
- Step 7 / Then repeat the same steps braiding the other half into a second fishtail braid.

Two Dutch Braids Instructions:
- Step 1 / Start by dividing the hair into two equal halves and tie off one side.
- Step 2 / Then simply braid each half into a dutch braid. As a reminder, when creating a dutch braid, the side strands are crossed under the middle strand and small sections of hair are brought into the braid as you work your way from the forehead down to the nape of the neck.
- Step 3 / Once all of the hair is brought into the braid continue braiding the section down to the ends.
- Step 4 / Tie off the bottom of the braid with a little clear elastic band.
- Step 5 / Then repeat the same steps with the hair on the opposite side.
Tip: You can go back over both braids, pulling on the sides to make them fuller or leave them tight against the head, it just depends on your own personal style.
Half Up Fishtail Braid Instructions:
- Step 1 / First, divide off a section of hair on both sides of the head right above the ears and tie it together at the back of the head.
- Step 2 / Then with this tied off section, create a fishtail braid by splitting it into two sections and crossing small pieces of hair from one half over to the opposite side.
- Step 3 / Continue the braid as far down the section as you prefer and I like to pull on the sides of the braid as I go to make it fuller and more casual and then just tie off the end of the braid with a clear baby elastic.

Low Bun Instructions:
- Step 1 / For this style, start by combining all of the hair together at the nape of the neck.
- Step 2 / Take a hair band and wrap it over the hair only pulling the ponytail half way through.
- Step 3 / Then twist the left hand which will twist the hair and the hair band at the same time and then grip the base of the ponytail with the left hand.
- Step 4 / With the right hand, pull the hair band over the hair. This will create the base of the messy bun.
- Step 5 / Then take any hair left sticking out and tuck it back into the hair band.

Dutch Braid Instructions:
- Step 1 / Begin by gathering a section of hair at the top of the head and split it into three sections.
- Step 2 / Cross the side strands under the middle strand while bringing in new sections of hair and working down the back of the head until the braids reaches the nape of the neck.
- Step 3 / Then continue the braid down the section of hair without bringing in any new hair.
- Step 4 / Then tie off the end of the braid with a clear elastic band.
Bonus Sleep Bun Instructions:
This next style really isn’t a wearable hairstyle but it;s great if you got a blow out or curled your hair before the trip and want to take a nap without getting any kinks in your hair.
- Step 1 / Simply combine all of your hair together at the top of your head.
- Step 2 / Twist it together and wrap it into a spiral or bun on the top of your head.
- Step 3 / Then secure the ends with a claw clip.
- Step 4 / Once you’ve arrived at your destination simply let down your hair and it’s still maintained a bit of the curl or volume you had put into it before the trip.


Wow, the 1st picture with 2 braids. .. has you looking very Nicole Kidman-esque! Can’t go wrong with that.
Live your skill and hair inspiration .??Hope your enjoying the Valley!
I love all of these!
Unfortunately I just resort to possibly the world’s messiest bun and just leave it on my head like a very sad, but colourful potato.
I really want to try out some of these though :).
Haha, that made me laugh (: I’m glad you enjoy the tutorial. Thank you for watching (: