
 Today’s tutorial is a round up of three edgier hairstyles that all incorporate a dutch braid. These styles can be worn for a number of different events whether you’re looking for that next chic gym style, something to wear to a concert, or just a simple way to amp up an otherwise everyday hairstyle. One of these looks (or all three!) might be just what you’re looking for and may be your new favorite style.

Four Dutch Braids Instructions:
- Step 1 / Create a center part and continue it down the back of the head.
- Step 2 / Tie off the hair on the right side to keep it out of the way while working with the left.
- Step 3 / Create a second part splitting the left section into two small sections; creating a horizontal part along the temple and down towards the nape of the neck.
- Step 4 / Tie off the bottom section to work on the top section.
- Step 5 / Create a dutch braid beginning at the hairline and working down to the nape of the neck.
- Step 6 / Tie off the braid with a clear elastic band to keep it from unraveling.
- Step 7 / Let down the lower section and braid it into a second dutch braid.
- Step 8 / Remove the elastic from the first braid, combine the two together and braid to the ends.
- Step 9 / Secure the end of the braid with an elastic band.
- Step 10 / Let down the hair on the right side and repeat steps 3 through 9 creating two more dutch braids, combining them together and tying it off with an elastic band.


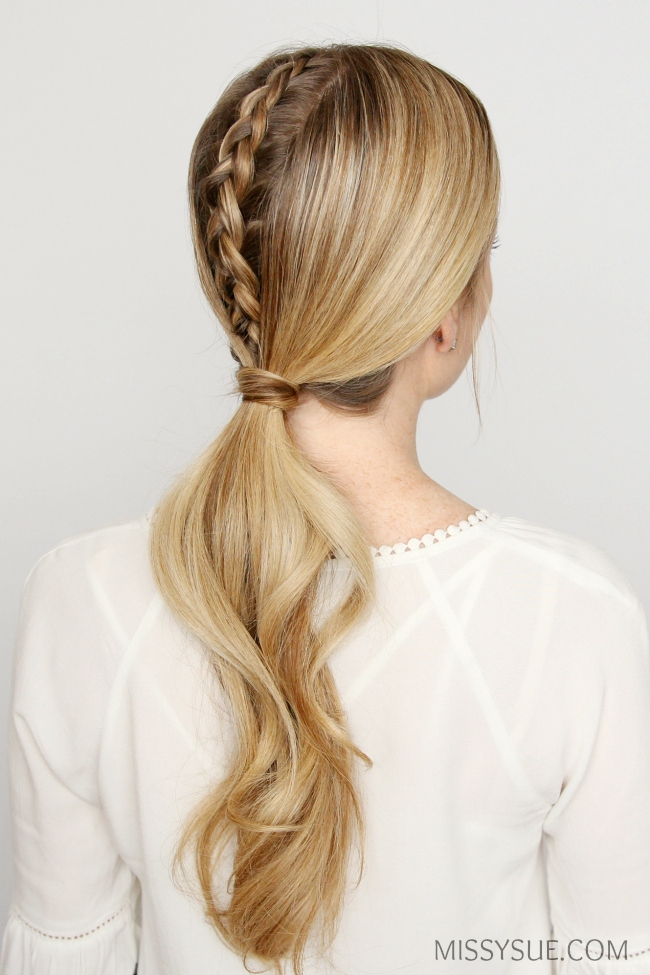
Dutch Spine Braid Low Ponytail Instructions:
- Step 1 / Part the hair where you’d normally prefer it. I’ve put my slightly off-center towards the left side.
- Step 2 / At the center of the crown create a 1″ horizontal part towards the left.
- Step 3 / Trace the part down to the nape of the neck and clip off the hair on the left side.
- Step 4 / Starting at the center of the crown again, create a 1″ horizontal part towards the right side this time.
- Step 5 / Then trace straight down to the nape of the neck, clipping off the hair on the right side; essentially creating a vertical slice of hair down the center of the back of the head for our braid.
- Step 6 / Pick up a small slice of hair at the top of the section left out and divide it into three equal pieces.
- Step 7 / Create a dutch braid, crossing the side strands under the middle and incorporating hair into the braid.
- Step 8 / When the braid reaches the nape of the neck and all of the hair is brought in, create a few more stitches of the braid and tie it off with an elastic band.
- Step 9 / Let down the hair on the left and right side and combine it into a low ponytail with the braid.
- Step 10 / Wrap the ponytail with a hairband and hide the band with a small section of hair, securing it with a second elastic band.

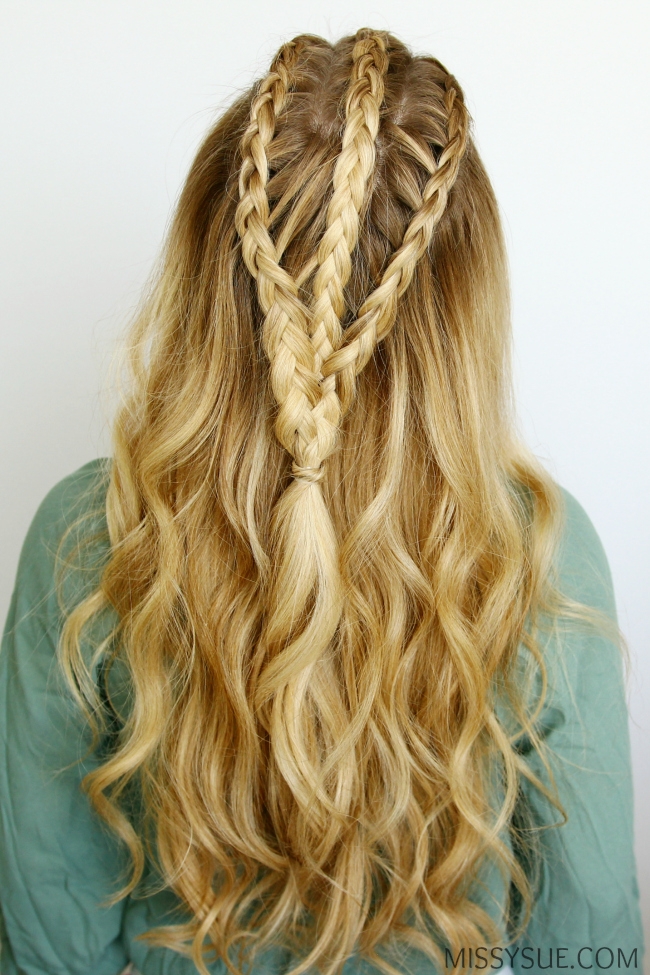 Half Up Mohawk Dutch Braids Instructions:
- Step 1 / Divide out a 1″ section of hair along the center of the top of the head.
- Step 2 / Tie the rest of the hair into a low ponytail to keep it out of the way.
- Step 3 / Braid the top section into a dutch braid until it reaches the crown
- Step 4 / Continue braiding the section into a regular 3-strand braid until it reaches the middle of the back of the head before tying it off with an elastic band.
- Step 5 / Pick up a small section on the left side of the braid and create a second dutch braid right next to the middle one.
- Step 6 / Once the braid reaches the crown, continue adding in hair to the right side of the braid to create the “V” shape you see at the end.
- Step 7 / When the second braid is an inch away from the elastic on the first braid, create a gap in the first braid and pull the side strand from the second braid through the gap.
- Step 8 / Continue the braid until it reaches the elastic on the first braid.
- Step 9 / Remove the elastic and tie the two braids together.
- Step 10 / Repeat steps 5 through 9 creating a third braid on the right side of the middle braid.

Love it! I know this is pretty unrelated, but how did you start up your website and our blog?
All three are great options, so pretty!
xx Kelly
Sparkles and Shoes