

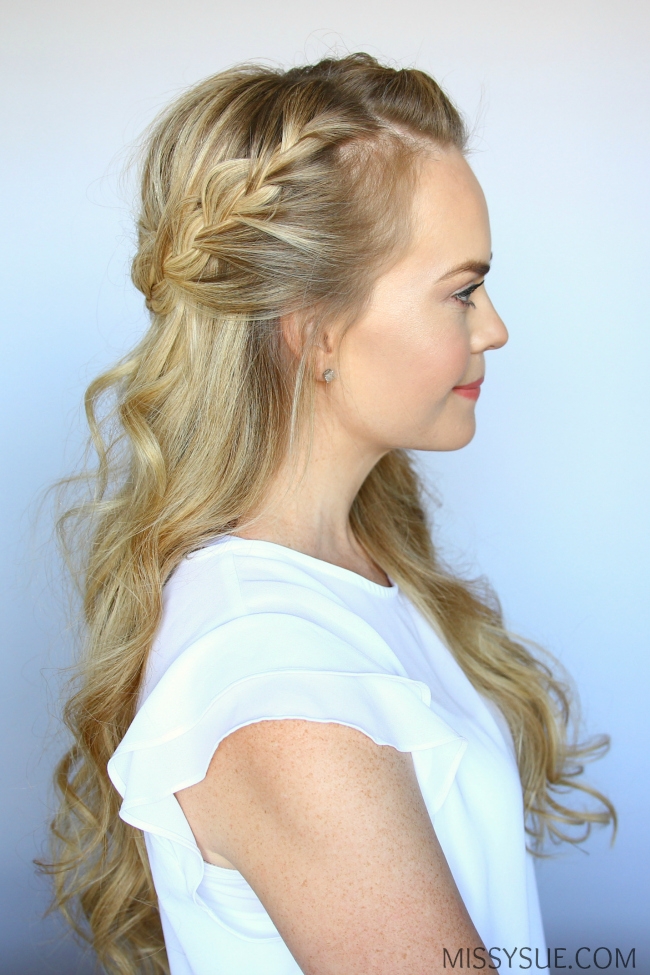
It’s time to change up your look and learn a new hairstyle that is perfect for any season! Today I am partnering with Sally Beauty to share with you how you can easily create these everyday curls along with this pretty half up french braid crown. Anyone can learn how to achieve this look using the right tools and styling products from Sally Beauty so let’s get right into the tutorial!

Watch the video and check out the step-by-step instructions below to see how to create these everyday curls and fun, trendy hairstyle that works for any occasion!

Step 1 / On freshly washed hair, begin by working a small amount of the Beyond the Zone Keep It Together Braid Cream from the mid-shaft to the ends of the hair. This will help control flyaways and frizz to create a smooth and touchable style.
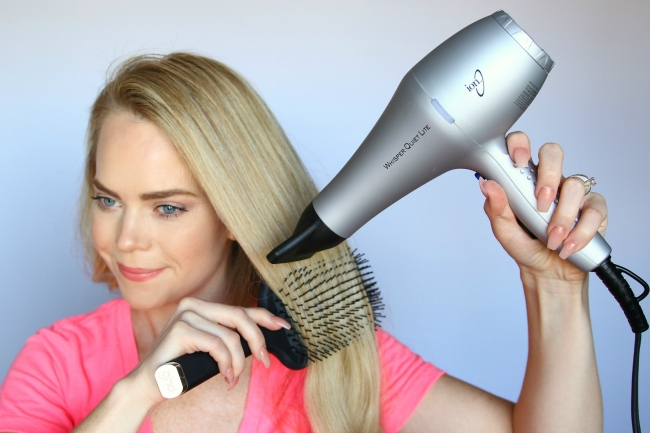
Step 2 / Next blow dry the hair with the Ion Whisper Quiet Lite Blow dryer. Use a paddle brush to follow the dryer down small sections to help create an even smoother style.

Step 3 / Section the hair above the ears, clipping off the top portion. Pick up the Ion Titanium Platinum Pro Curling Iron and divide off a 1” section of hair. Curl this section away from the face by clamping it in the middle, rolling it up to the roots, holding for 5 seconds, then dropping the iron to the ends, wrapping it up a second time and holding it for 5-8 seconds before releasing the section.
Step 4 / Repeat the precious step curling all the hair from this bottom layer, alternating the direction of the curl either towards the face or away from the face.
Step 5 / Use the Ion Titanium Pro Multi-Styler to go back and smooth down any wavy pieces around the hairline.
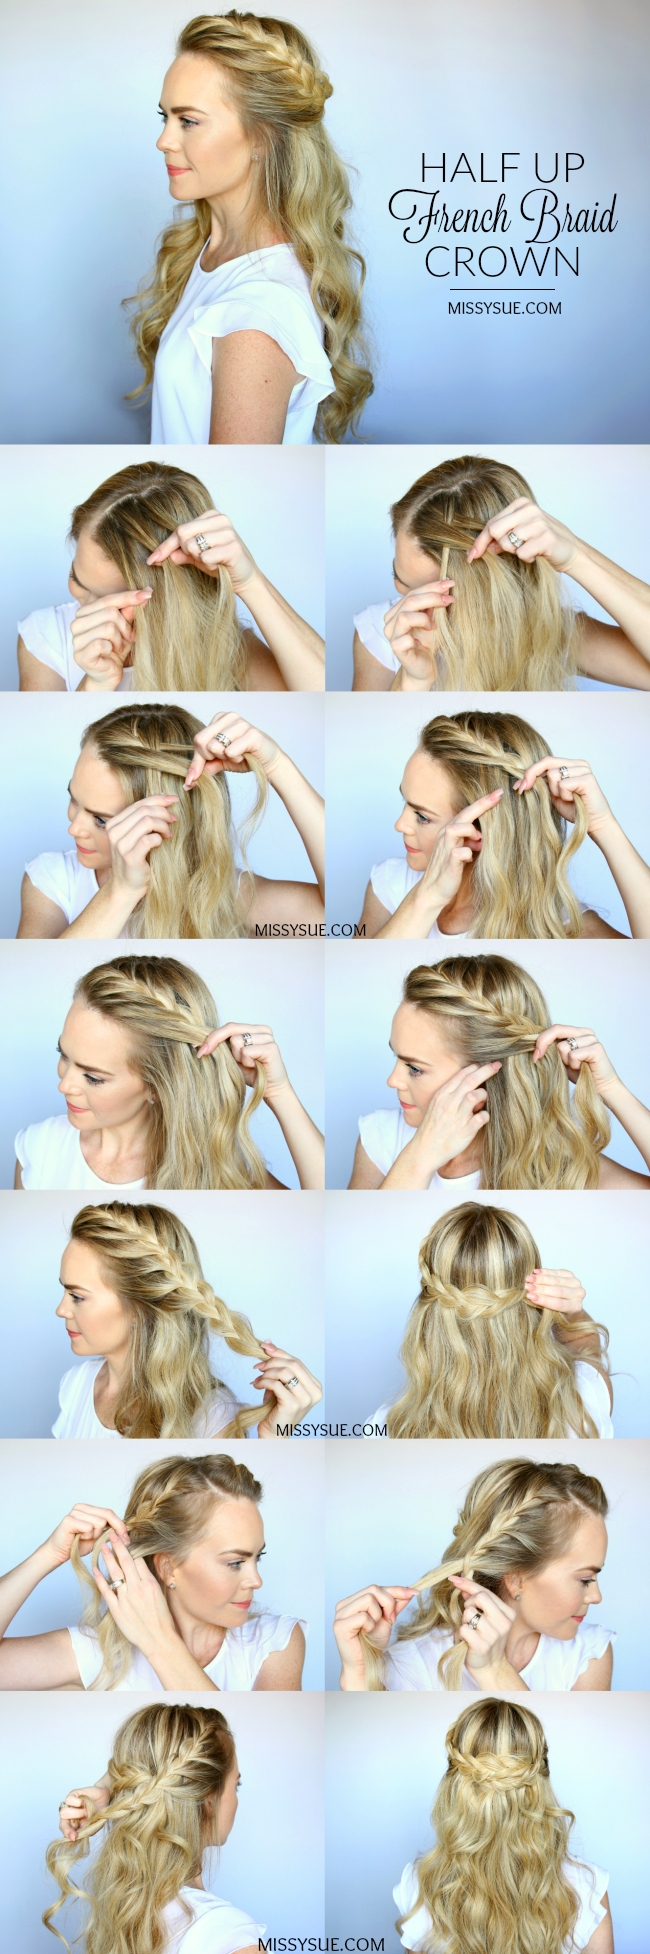
Step 1 / With a part on the right side pick up a small section near the part on the left side.
Step 2 / Divide this section into three equal pieces for the braid.
Step 3 / Begin a french braid by crossing the side strands over the middle.
Step 4 / Start incorporating hair into both sides of the braid until it reaches the temple.
Step 5 / Now stop adding in hair to the top of the braid and continue bringing in hair to the bottom until it reaches the left ear.
Step 6 / Then braid the rest of the section to the bottom in a regular braid.
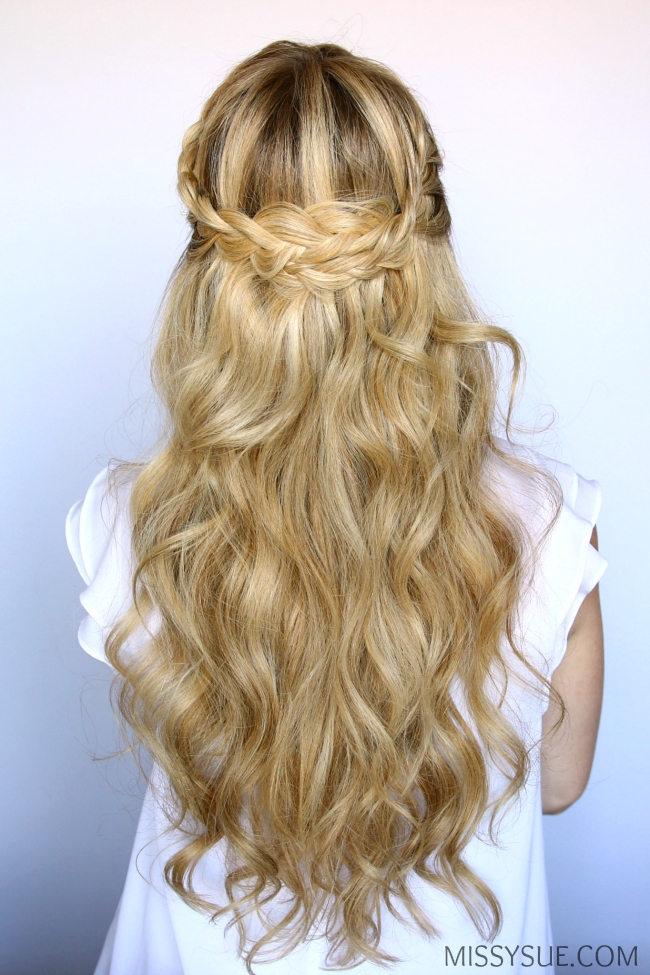
Step 7 / Gently pull on the edges to loosen the braid and wrap it around the back of the head, securing it with 1-2 bobby pins.
Step 8 / Now repeat the same steps on the the right side, creating a second french braid, adding in hair until it reaches the left ear and braiding the section to the end in a regular braid.
Step 9 / Wrap the braid underneath the first one and pin it in place with 1-2 bobby pins.
Step 10 / Gently loosen the bottom of the second braid to make it a little fuller as the last step.

All of the products used in this post are available at any Sally Beauty store or online at SallyBeauty.com. Sally Beauty is a hidden gem for finding salon-quality products priced under $10 so you can easily achieve any look on a budget without having to sacrifice quality. They always stand by their Love It or Return It, Guarantee.

Thank you to Sally Beauty for partnering on this post.