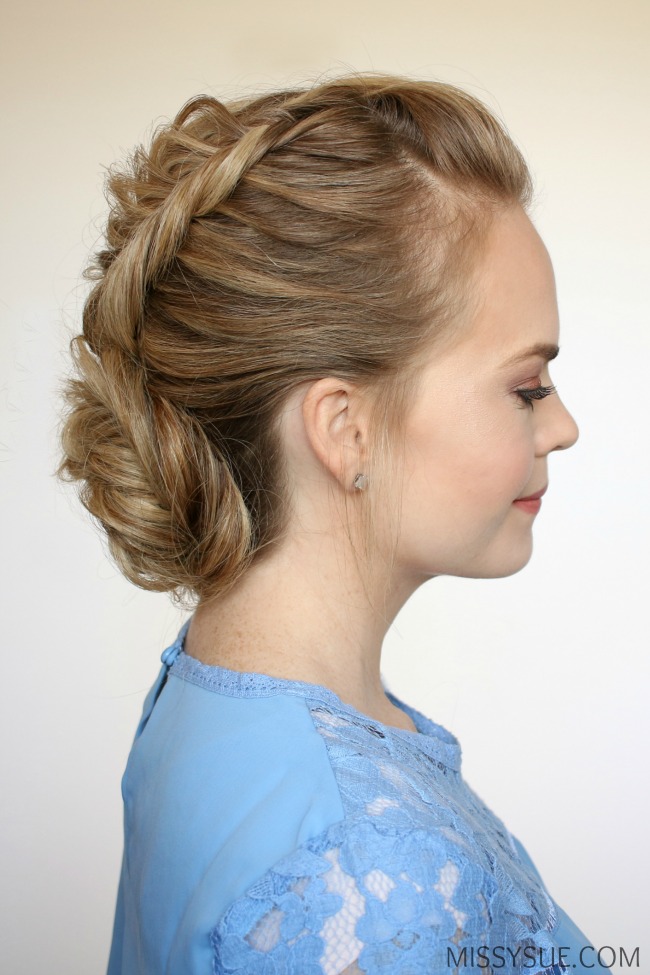

Prom is right around the corner and bridal season is nearly here so I wanted to create a tutorial that would work for either occasion! I found this look on instagram from @lenabogucharskaya and immediately fell in love! It’s such a unique hairstyle that I literally couldn’t wait to film the tutorial. I think this hairstyle is so uber chic and would even be fun for date night which is where I’ll be wearing it since I don’t have any fancy occasions coming up. I hope you love the tutorial and be sure to comment, like, subscribe, and share with your friends so they can love it too!

Dutch Fishtail Low Bun Supplies:

Dutch Fishtail Low Bun Instructions:
- Step 1 / Begin by brushing the hair back straight back from the forehead.
- Step 2 / Divide off a section behind the forehead, twisting it together and pinning it against the head to create a small pompadour.
- Step 3 / Pick up a small slice of hair about 2″ wide behind the pinned section, on the right side, and divide it into two smaller pieces.
- Step 4 / Begin a fishtail braid by crossing small pieces of hair from one section underneath to the opposite section, alternating between each side.
- Step 5 / After one stitch of the braid, start bringing in small section of hair to create a dutch fishtail braid.
- Step 6 / Continue braiding the hair trailing it diagonally down the back of the head towards the nape of the neck, behind the left ear.
- Step 7 / When all of the hair is brought into the braid, continue braiding the section to the bottom in a regular fishtail braid, tying off the end with a clear elastic band.
- Step 8 / Grab some bobby pins and slide them along both sides of the braid. This will help anchor the braid and keep it’s shape since we are going to pull it apart to make it fuller.
- Step 9 / Now gently pull on the edges of the braid to make it wider, working up from the neck towards the top of the head.
- Step 10 / Then pull on the tail of the braid starting at the hair elastic and working up to the nape of the neck. The more you pull on the tail, making it wider, the bigger the bun will be once it’s wrapped.
- Step 11 / Take the end of the braid and wrap it up towards the right side of the head, creating a “U” shape.
- Step 12 / Then continue wrapping it counter clockwise into a spiral, tucking the ends into the center.
- Step 13 / Slide bobby pins around the base of the bun, underneath the hair, until it feels tight and secure against the head.
- Step 14 / Spray the style with hairspray and smooth down any flyaways.


Can this be done with waist-length hair?
Yes, I believe so (:
What a pretty look!
xx Kelly
Sparkles and Shoes