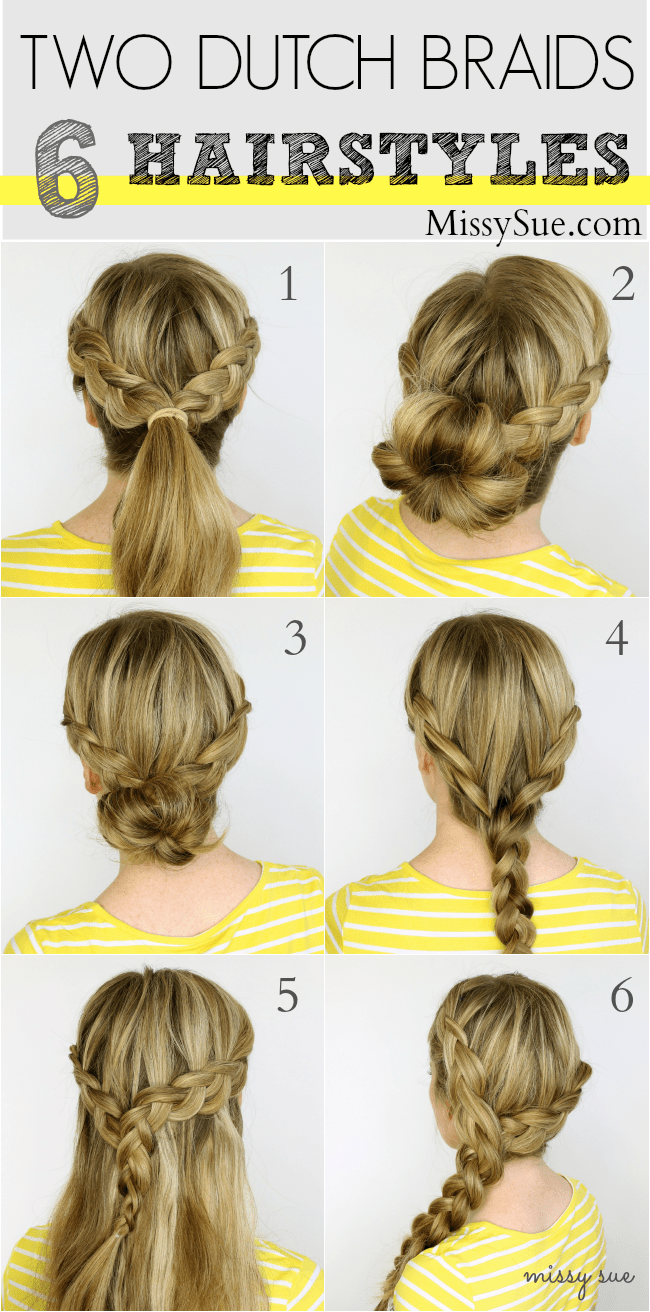
Two Dutch Braids – 6 Hairstyles features unique ways to style two side Dutch braids.
Dutch braids are my absolute favorite because they are easy to do and always look so chic! With summer here and my “no heat” challenge in full swing I have been putting on my thinking cap every single day, delving into many new ideas for hairstyles.
Since wearing Dutch braids is one of my go-to look’s, I thought it would be fun to share six ways that I have been wearing the two braids!
If you’re not feeling the steps, there’s a video tutorial at the bottom, yay!


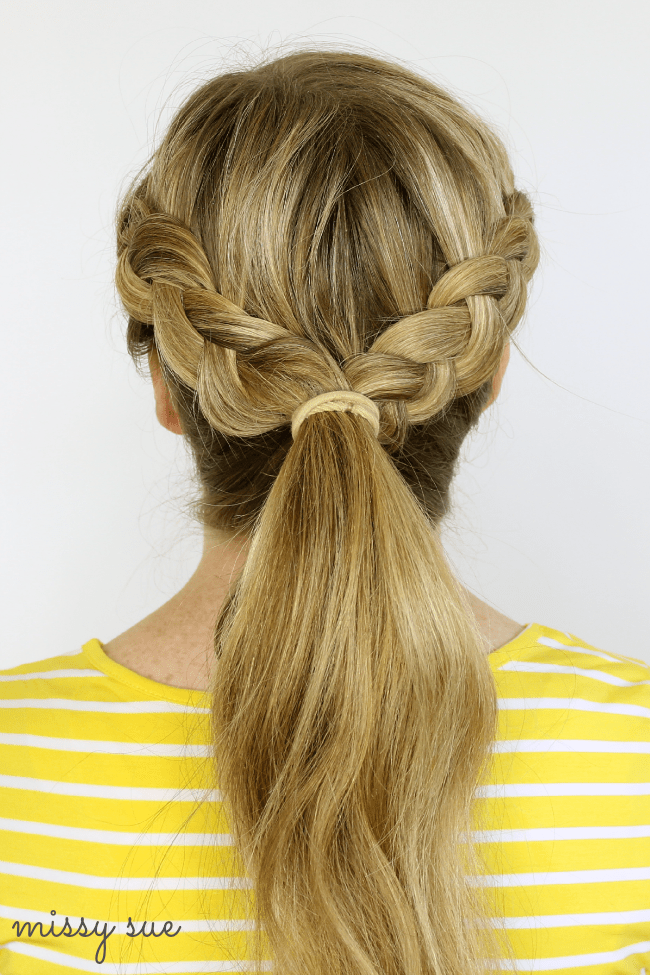
Look 1 : Two Dutch Braids into Ponytail
Step 1 / Start by parting the hair; a side part or middle part works fine for this look.
Step 2 / Now part the hair the hair into two sections by tracing a line down the back of the head.
Step 3 / Tie off the right side so it doesn’t tangle with the left.
Step 4 / Take a section of hair, on the left side, at the front of the head, and divide it into three sections.
Step 5 / Cross the side strands under the middle, pulling in hair as you go.
Step 6 / Tie off the braid when it reaches the back of the head.
Step 7 / Repeat steps 4 through 6 with the right side.
Step 8 / Make a ponytail with the leftover hair at the center of the back of the head.

Look 2 : Two Dutch Braids into a Bun
Step 1 / Complete steps 1-8 above.
Step 2 / Take a section of hair from the top of the ponytail and tuck it into the hair band creating a loop.
Step 3 / Repeat step 2 with the rest of the hair creating 4 to 5 loops.
Step 4 / Pull the loops tight by gripping the center of the bun and pulling in opposite directions.

Look 3 : Two Dutch Braids to Low Side Bun
Step 1 / Complete steps 1-8 from look one, angling the braids downwards so they finish at the nap of the neck, slightly off center.
Step 2 / Complete steps 2 through 4 from Look 2 above.

Look 4 : Two Dutch Braids into Single Braid
Step 1 / Complete steps 1 through 7 from Look 1 above, angling both braids downwards towards the nape of the neck.
Step 2 / Once both braids reach the nape of the neck begin braiding them together into a single braid.
Step 3 / Tie off the end with an elastic band.

Look 5 : Two Dutch Braids Half Up
Step 1 / Complete steps 1 through 3 from Look 1 above.
Step 2 / Take a section of hair from the let side and create three pieces.
Step 3 / Begin a Dutch braid wrapping each side strand under the middle piece.
Step 4 / When pulling in hair on the bottom portion, keep the strands really close to the braid so they don’t show underneath.
Step 5 / Tie off the braid once it reaches the back of the head.
Step 6 / Repeat steps 2 through 4 above with the right side.
Step 7 / When the right side braid reaches the left side braid, remove the hair tie and braid the pieces together into a single braid.
Step 8 / Tie off the end with an elastic band.
Step 9 / Gently pull on the sides of the braid to make them larger; this will hide the bottom portion where the hair was pulled in.

Look 6 : Two Dutch Braids into a Side Braid
Step 1 / Complete steps 1 through 3 from Look 1 above.
Step 2 / Create a Dutch braid on the left side of the head, angling it downwards toward the nape of the neck.
Step 3 / Tie off the braid to keep it from unraveling.
Step 4 / Create a section braid on the right side, up next to the part.
Step 5 / Trail the braid across the top of the forehead, down towards the right ear, and across the back of the head towards the other braid.
Step 6 / When the right braid reaches the left, braid the two together to create a side braid.
I did style number 6 on my daughter’s hair today. She LOVED it!! Thank you so much! You have the best hairstyles! :)
Oh very cool!