How to Apply Eyeshadow will show you how to apply color from three different types of eyeshadow palettes: a duo, trio, and quad palette.
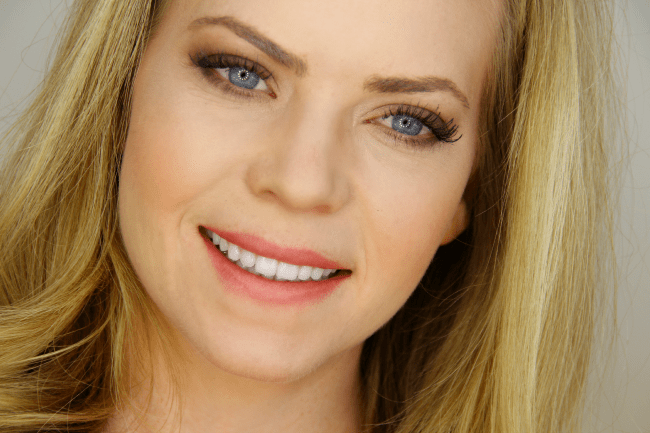
While there are numerous ways to apply eyeshadow, I have found these techniques to work for me and my specific eye shape. My eyes would be classified as hooded, meaning most or all of the lid disappears when the eyes are open. Many people think hooded eyes are only seen on older/mature women when they can actually be found on many people including Blake Lively, Jennifer Lawrence, and Taylor Swift.
I have received many questions since starting and writing this blog but one of the most common ones pertains to eyeshadow, flattering shades for specific eye colors or application techniques. Therefore, I have decided to dedicate an entire post to show you how I apply eyeshadows differently depending on how many colors I have at my disposal in a specific palette or how much time I care to spend on my shadow before I am dashing out the door.
Eyeshadow can directly impact your look and the shape of your eyes by how it is applied. My number one tip is learning the shape of your eyes and how you can apply eyeshadow so it is the most flattering on you. I hope these tips below will help you along the way!

Click to read moreBefore beginning, always prep the eyelids with a good primer or great concealer. If your concealer tends to be a bit sticky, dust some translucent powder over the eyelids to avoid eyeliner transfer later in the day.
Step 1 / With the lighter color in the palette, dust this shade from the lash line to the outer edge, to the inner corner, and up towards the brow, leaving a small area clear directly under the brow.
Step 2 / Next, sweep on the darker shade directly in the crease, creating a “C” shape from the lash line to the outer edge and down through the center of the eyelid space. The first shade, from step 1, should peek out the top and bottom of this color.
Step 3 / Grab a big, fluffy brush and blend the two shades together using circular motions and back and forth (windshield wiper) strokes. This creates a seamless look, removes harsh edges/lines, but still leaves a slight distinction between the two shades.
Step 4 / Next, grab a tiny accent brush and apply the lighter shade to the lower lash line from the inner corner to the middle of the lower lashes.
Step 5 / Then, with the darker color, sweep these from the middle of the lower lash line out to the outer corner, connecting it with the darker shade on top.
Step 6 / Take the brush from the first two steps and sweep it along the lower lash line to better blend the two shades together.
Step 7 / Repeat steps 1-6 on the other eye; finishing with liner if so desired and a swipe of mascara.
Products Used:
- Clinique All About Shadow, Duo Palette in Strawberry Fudge
- Real Techniques Shadow Brush
- E.L.F. Shadow Brush
- Sigma E40 Tapered Blending Brush
- Real Techniques Accent Brush

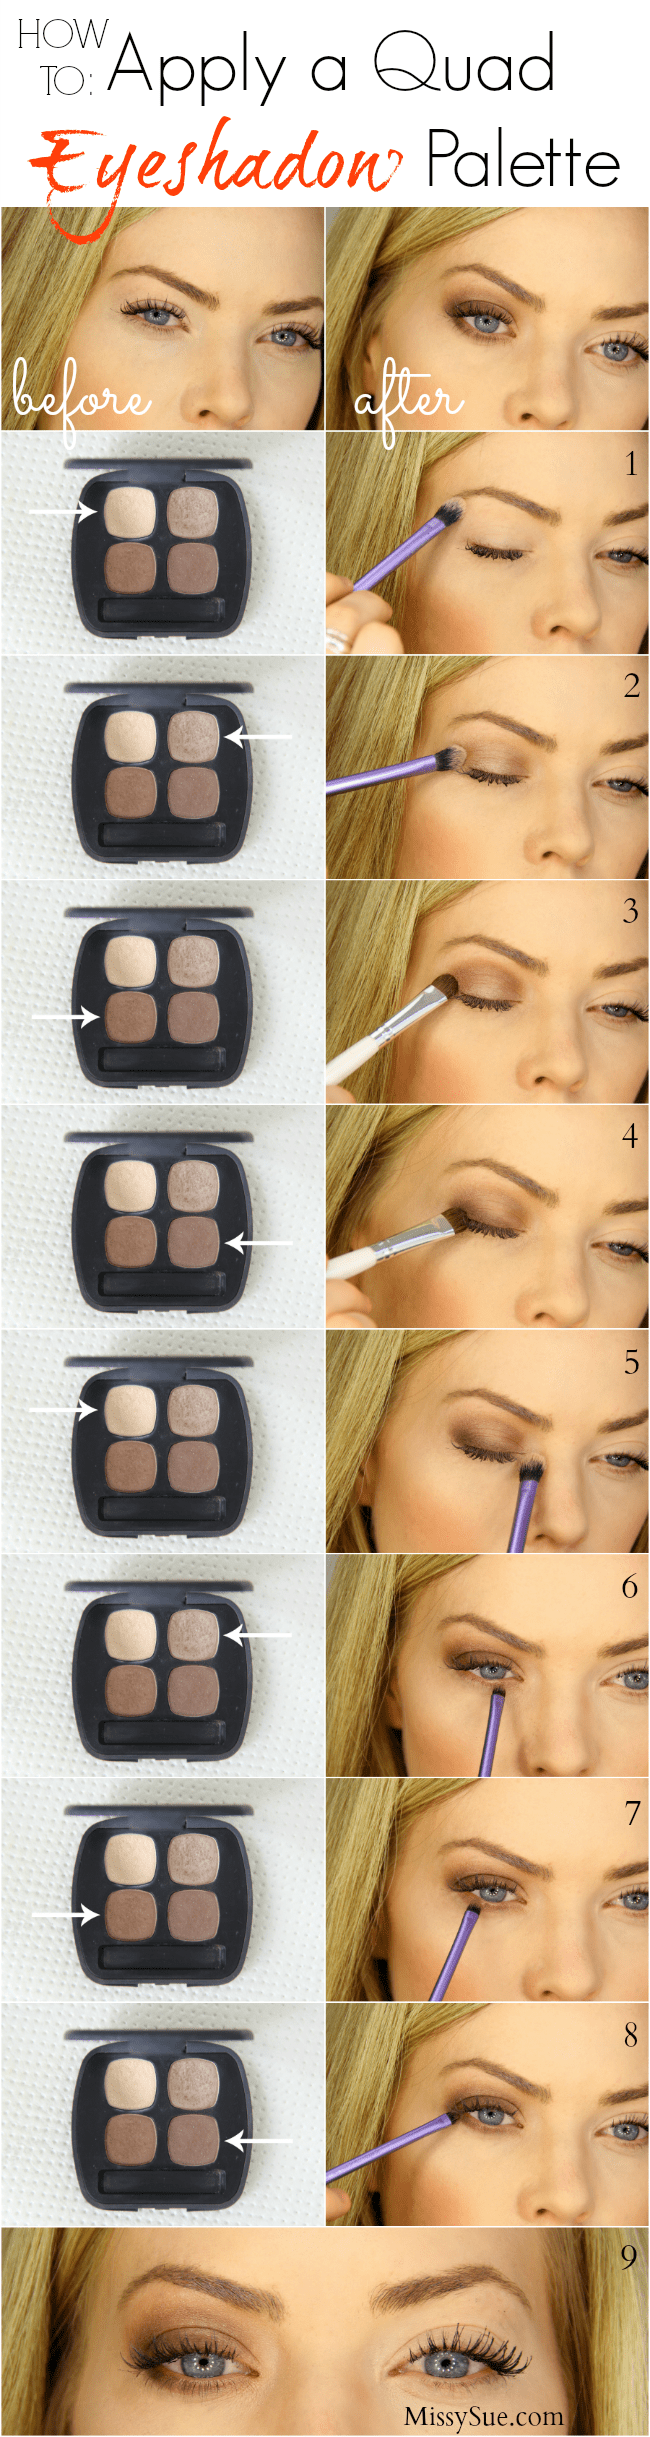
Step 1 / With the lightest shade in the palette, dust this color over the entire lid space, from the brow all the way down to the lash line.
Step 2 / Next, using the medium shade, dust this in the “transition area” (the space from slightly below the crease to just above the crease) creating an upside down arch shape.
Step 3 / Then, with the darkest shade, create a flattened “C” shape from the outer edge through the crease, thinning it out in the inner corner, and extending it down to the lash line in the outer corner.
Step 4 / With a big, fluffy brush, blend the colors together using circular motions and back and forth (windshield wiper) motions to create a seamless look between all three shades. **Keeping the lid a lighter shade can help create the illusion of an eye that is more open and less hooded.
Step 5 / Next, take a tiny accent brush and apply the lightest shade to 1/3 of the lower lash line from the inner corner towards the middle.
Step 6 / Then, with the middle shade, start this shade where the lighter one stopped and blend it towards the outer corner, covering the very center of the lower lash line.
Step 7 / Using the darkest shade, blend this color starting where the other stopped then towards the outermost corner until it connects with the color on top.
Step 8 / Repeat steps 1-6 on the other eye. Swipe on some liner and mascara to finish the look.
Products Used:
- Jane Iredale PurePressed Triple Eyeshadow in Triple Cognac
- Real Techniques Shadow Brush
- E.L.F. Shadow Brush
- Sigma E40 Tapered Blending Brush
- Real Techniques Accent Brush
Step 1 / Start with the lightest shade and dust it over the entire lid space, from the brow all the way down to the lash line.
**If your lightest shade is a cream or white color, then this step is possible, if it is a darker pink like in the duo above, then it’s best to leave the highlight area (directly under the brow) completely clean of shadow.
Step 2 / With the next lightest shade, sweep this color over the entire lid, from the crease down to the lash line.
Step 3 / Using the next darkest shade, create an upside down arch shape in the “transition area” (the space from just above the crease to just below the crease).
**Not shown: Blend out this line with the large fluffy brush to smooth any lines or edges.
Step 4 / Next, using the darkest shade in the palette, create the look of liner sweeping color along the lash line and slightly extending it past the outer edge and up towards the tip of the eye brow. This creates the effect of eyeliner but without the use of actual liner.
Step 5 / Now go back with the lightest shade and dust this in the inner corner. **Keeping the inner corner a lighter shade will help keep the eyes from looking closed off or appearing too close together. Both no bueno when dealing with hooded eyes.
Step 6 / With the next lightest shades, sweep this along the inner 1/3 of the lower lash line.
Step 7 / Then, using the next darkest shade, dust it in the center of the lower lash line.
Step 8 / Lastly, with the darkest shade, sweep this along the outer 1/3 of the lower lash line, connecting it to the same shade on the top of the lid.
Step 9 / Repeat steps 1 through 8 with the other finishing with a few swipes of mascara.
Step 10 / Repeat steps 1-6 on the other eye. Swipe on some liner and mascara to finish the look.
Products Used:
I like your blog, And i can say its really helpful.
Thanks :)
Thank you, this was very helpful and it is great for beginners!
You make it look so easy! Your eyes are so pretty.
I’m a lot older than you and have brown eyes. I need an eye palette with no sparkles, just matte. Do you have a favorite you could recommend?
I’d definitely recommend the Urban Decay Naked Basics palette. They have two and they are great for everyday!
I love this! Your eye shadow looks amazing!
Thank you, Rachel! (:
So many great tips, I love this post!
Thank you!
You make it look so easy, and you do it so beautifully. Could I just hire you to come to my house each morning at around 6:00 am? In all seriousness, I loved these tips!
Hahaha, thanks, Nancy!
Looks great! It’s pretty funny how eyes an be shaped so differently. Mine are essentially the opposite of yours! Nothing that is applied disappears – everything just stays. I think yours are more common! It took some adjusting learning to apply eyeshadow haha.
christycee.blogspot.ca
Thanks, Christy! Haha, sounds lucky! Glad you liked it ((:
Thanks, this really helped!
Sure thing, Ashley! (:
thanks for showing how to apply eyeshadows i find it helpful since am new at doing it…..
You’re welcome (: glad you enjoyed it!