


Today’s tutorial is a hairstyle that every girl should know how to do. It’s perfect for all year round and never goes out of style. If you have already mastered and love the french braid then the next braid on your list should be the dutch braid.
This is a look I wear all the time but have never shared a stand alone tutorial for it. I love hearing how my tutorials have taught you different styles and techniques so I hope you take that away from this video as well. Try it out and share it with your friends; I’m sure they’ll love it if you do. Thanks so much for reading! xo, Missy
Dutch Side Braid Supplies:
- Rattail comb
- Clear elastic band
- Medium-hold hairspray
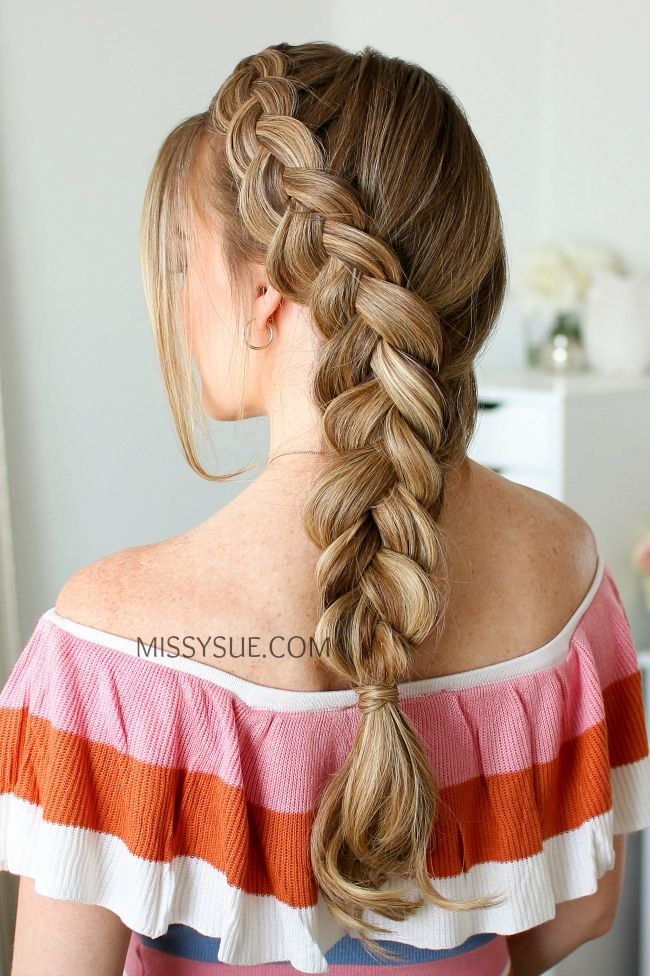

Dutch Side Braid Instructions:
- Step 1 / Begin by parting the hair on the right side.
- Step 2 / Divide out a section of hair to frame the face.
- Step 3 / Pick up a section on the left side of the part and divide this into three pieces for the braid.
- Step 4 / Start the dutch braid by crossing the right strand under the middle strand. Then cross the left strand under the middle strand.
- Step 5 / Now cross the right strand under the middle, pick up a new section and cross it under and into the middle.
- Step 6 / Then cross the left strand under the middle, pick up a new section and cross it under and into the middle strand.
- Step 7 / Repeat those steps, crossing the side strands under the middle strand while bringing new sections into the braid, keeping the braid along the left side of the head.
- Step 8 / Once all of the hair from along the part line is brought into the braid, then start adding in hair from the right side of the part, sweeping it around the back of the head adding it into the braid.
- Step 9 / Then once the braid reaches the nape of the neck, and all of the hair is brought into the braid, then continue braiding the section a little further down and tie off the end of the braid with an elastic band.
- Step 10 / Now go back over the braid, pulling on the edges to make the braid wider and more full.
- Step 11 / Then set the style in place with a medium or firm hold hairspray.
- *Tip: If little pieces fall out of the braid, at the back of the head, use bobby pins to pin them into the back of the braid.


I love braided hairstyles and whenever I need some inspiration I head to your blog. Especially when getting ready for weddings! This one looks stunning and I have to try it out.
Thank you for all the amazing looks!