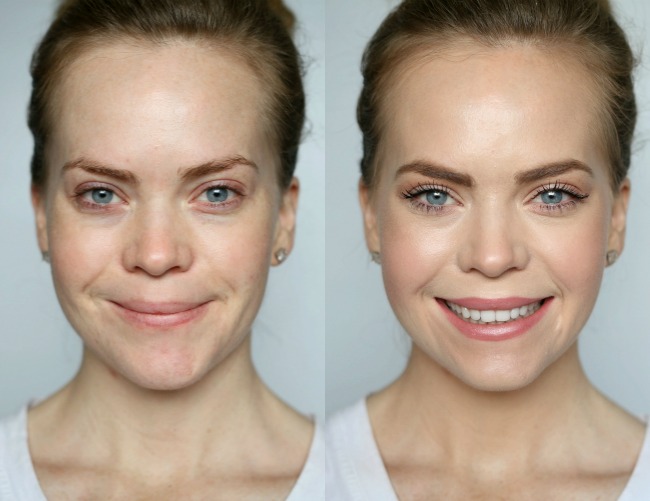

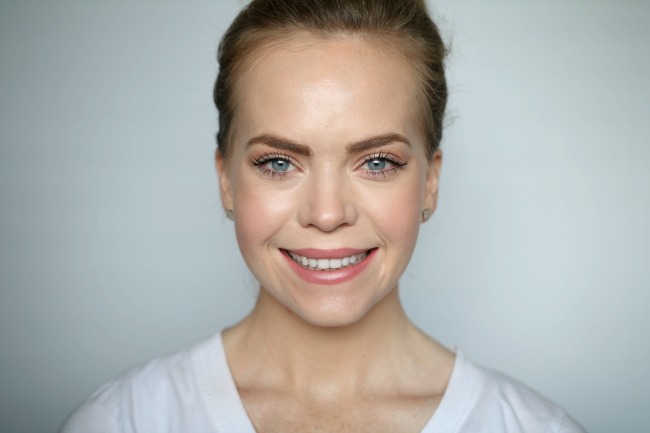
I am one of those girls that wears makeup everyday. Yep, it’s true – I know to some it probably seems a little ridiculous but it’s where I feel the most comfortable. So today I wanted to share with you my easy, #basic makeup routine that says “I’ve got my [stuff] together” even when I really want to stay in my pajamas all day playing with Cohen. This tutorial is easily adaptable to whatever your day entails. Add some eyeliner, subtract the lip liner; doing whatever your heart desires is key so let’s get started.
Step 1 / I love to start with a clean, fresh face. I am not always up for a full washing in the morning, it is literally my least favorite part when it comes to skincare. In place of that, I will splash some Clinique Clarifying Lotion #1 onto a cotton round and swipe it all over my skin. It helps it feel revitalized, refreshed and ready for the concoction of products I am about to throw on it.


Step 2 / Next up is moisturizer. I am not super picky about the moisturizer I use in the mornings. My only requirement is that it contains SPF and try to shoot for the 15-30 range. I have tried a wide assortment of daily moisturizers and am currently using this one from Olay.
Step 3 / After letting my moisturizer sink in, I apply a primer. I literally feel naked if I forget primer. I am currently obsessed with Prep+Prime from MAC because this stuff is ah-mayzing. With my dry skin this feels like a second moisturizer; drinking it all in.
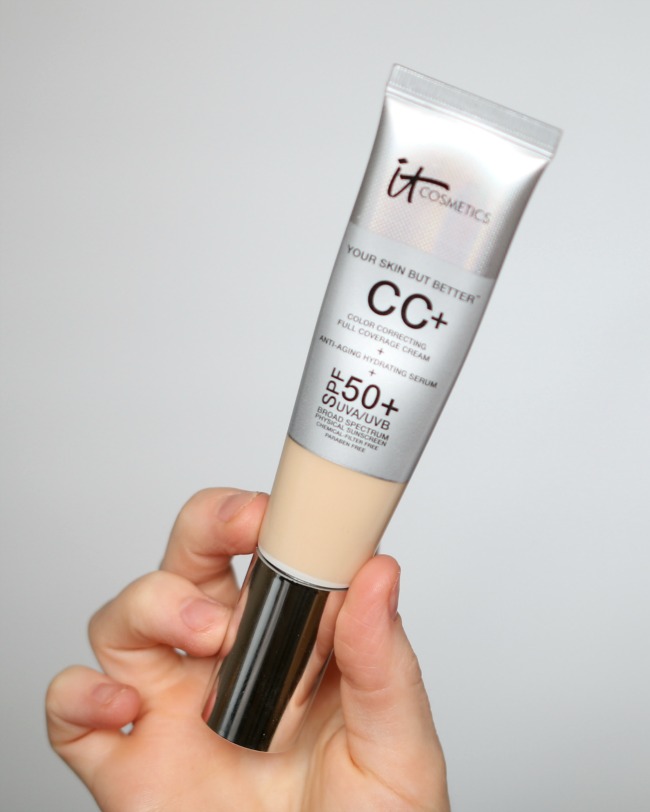

Step 4 / Once that’s soaked in, I apply my foundation or base. Recently I got my hands on It Cosmetics CC Cream and it has been such a great transition into the warmer months. I love to build it up to a fuller coverage. which I prefer, and it lasts as long as some of my other favorite foundations. I am applying it with the Real Techniques Buffing Brush, another fave.
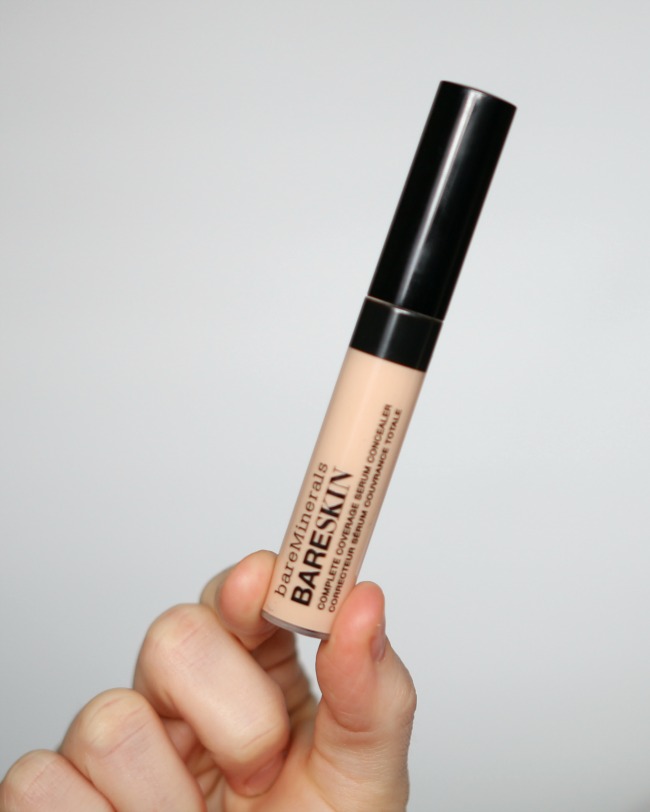

Step 5 / Next up is concealer and I have fallen in love with Bare Minerals BareSkin Concealer. It has a light, moisturizing coverage that is fabulous and goes under my eyes in a triangular shape. Then in an effort to contour my already pale skin I also apply it to the center of my forehead, down my nose, and to my chin. Of course, I don’t know how much good this is doing for me, but it’s now a habit so I go with it.


Step 6 / I am not a huge fan of using powder all over my face since my skin is already very dry, but I always set the concealer with a transparent powder. This one from MAC is gold and I can’t imagine using anything else on my dry skin. Also love this Real Techniques Setting Brush.

Step 7 / Next up is brows and this changed my life. I am absolutely in love with the thick, bold brow look and can’t go a day without filling these babies in with either powder or a pencil. Usually I dye them to a medium brown ash shade but am way past due on that beauty chore. When I need to fill them in, I have been reaching for this brow pencil from It Cosmetics. It is easy to use with its twist up design and comes with a handy dandy spoolie brush on the other end. A two in one combo that always makes it into my travel makeup bag.


Step 8 / On any regular day I always contour and bronze my skin. When I want to take it easy I reach for Bare Minerals Warmth bronzer and use this for both. I apply it to my cheekbones, temples, along the hairline of the forehead, under my jaw and bottom lip, around the front of my nose, and in the crease of my eyelids. An all in one bronzer shade but be sure to tap the brush off first or else you can mistakenly apply too much sun in one sitting. [Sigma brush 1, 2]


Step 9 / Blush! I live for blush. I could easily be that girl that applies waaaaaaay too much blush. In fact, I am sure there are times when I have by accident. I get so blush happy, going a little too crazy, that I have to hold myself back and gently wisp it on in short, subtle strokes to ensure I only apply the right amount. There are so many great shades and brands but I always go back to Orgasm by NARS. It’s easily a year-round favorite. [Real Techniques Multi-Task Brush]


Step 10 / If you’re a blondie like me then you understand the pain of invisible, white lashes. Mascara was the very first makeup I wore religiously and dreaded pool parties in high school because I was convinced I looked like a boy without my lashes on. This mascara from Benefit is my holy grail and I always make a special trip to Ulta for this little, baby tube of magic. I discovered Rapidlash a few years ago and the two together talk me out of wearing falsies every single morning.


Step 11 / One of my favorite lip secrets is a combination of liner and lip balm. Dervish by MAC matches my natural lip color so well, a “my lips but better” if you will, and find that swiping a lip moisturizer over the top is the perfect go-to for every day. The perfect combo for looking put together without feeling overdone.


Step 12 / At the end of this whole process my skin always begs for a little extra moisture so I set everything with a finishing spray. Here I am using Urban Decay All Nighter setting spray but swear by MAC Fix+ Finishing Mist too.
Shop 12 Steps to #Basic Makeup:
[show_shopthepost_widget id=”1456268″]
Quick pinnable image:

très joli !
Your makeup tutorials are awesome! I recommend your blog to almost everyone I know :)
Yet, I can’t decide whether I should go for a primer like the one by MAC. I have a sensitive combination skin and quite big pores. Would it clog the pores?
Thx for your help :*
What a gorgeous fresh look. I just bought my first primer yesterday because I had convinced myself it was a swizz, even though my make up is always half way down my face by lunch. Now if you HAD to pick only three things, like if you woke up and royalty as at your door so you couldn’t keep them waiting but there’s cameras and stuff, what would you pick?
Hahaha, I would definitely choose concealer, blush, and mascara (:
Thank you thank you thank you!!! I’m not much of a makeup gal, but I love wearing something basic and presentable. This is perfect! :)